Cooler Master Gemin II S524 Heatsink Review
Author: Dennis Garcia
Published: Tuesday, August 16, 2011
Installation
Installation is actually quite simple when it comes to total steps. Below you will find all of the installation parts that come with the Gemin II S624. In the kit you will find 2 sets of mounting rails. The individual rails are for Intel systems from 775 thru 1366 while the one peice bracket is used for AMD systems.
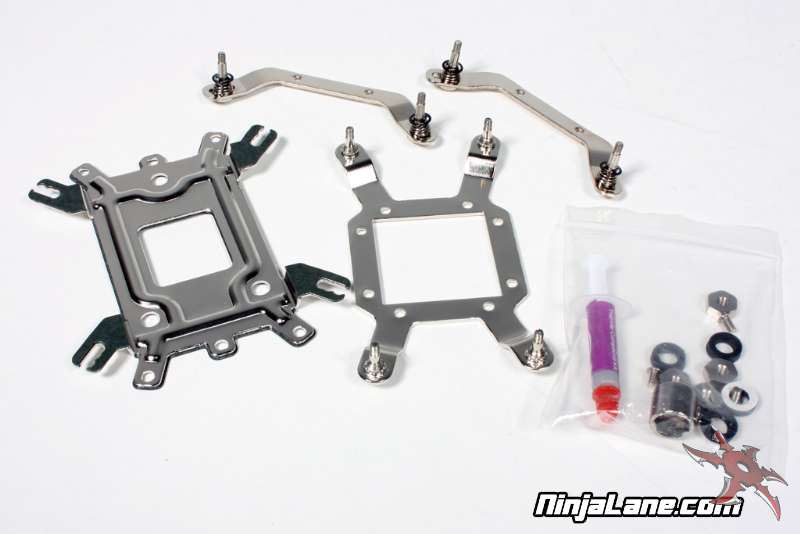

First you need to install the appropriate rail for your particular system. We will be testing on 1155 so we have picked the medium sized Intel rails. Install both sides and adjust the mounting screws to the notch that matches your system.
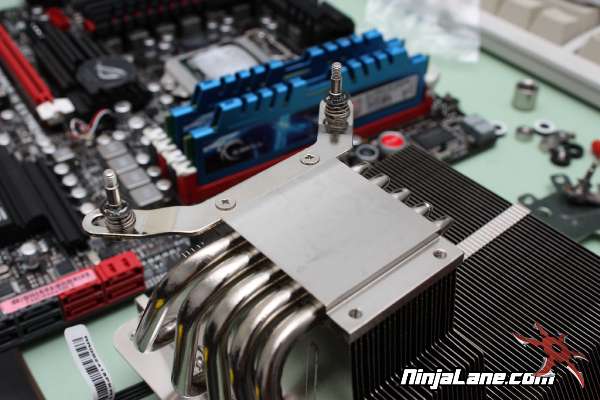
Apply a small amount of thermal paste to your processor and prepare to install the heatsink. There are two ways you can orient this cooler. The first would position the radiator directly over the PWM coolers while the second covers the memory modules.
As our photos indicate both positions have their benefits including the flexibility to run independent memory coolers or to let the CPU fan do that for you.
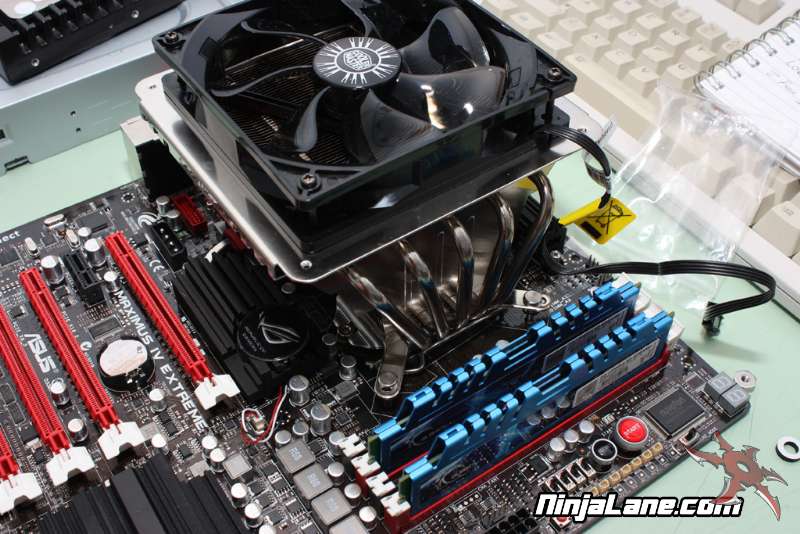
To secure the heatsink you will need to install the included metal back plate and secure the entire unit with the included nuts. The one thing we dislike about this installation method is having to balance everything while you install that first nut.
All of our heatsink testing is done outside of a chassis which allowed us to use the motherboard to hold everything in place. However, had this system already been installed in a case you would need to position heatsink with one hand, hold the back plate with another and then find two more hands to secure the nut in place.