After careful consideration I have decided to transfer all hardware review activities to a new domain. I purchased Hardwareasylum.com in 2012 and have been working hard to build a new and improved Ninjalane on that domain. If you are reading this you have reached one of the archived articles, news, projects and/or reviews that were left behind during the site migration.
Please update your bookmarks and be sure to visit the new and improved Ninjalane at Hardwareasylum.com
Installing an AMD Athlon64 Processor
Author: Dennis Garcia
Published: Monday, July 02, 2007
Processor Install
The Athlon64 is an amazing little processor that was the first on the market to support both 32 and 64 bit instruction sets. In an attempt to increase performance the memory controller was integrated into the processor die and thus removing the major performance variable when it comes to different motherboards and chipsets.
The purpose of this article is to illustrate the proper way to install a processor using the Athlon64 processor package, although this guide will apply to most ZIF socket systems.
The installation process is not that difficult and once you understand the mechanics you’ll be a pro in no time. Let’s start with the parts.
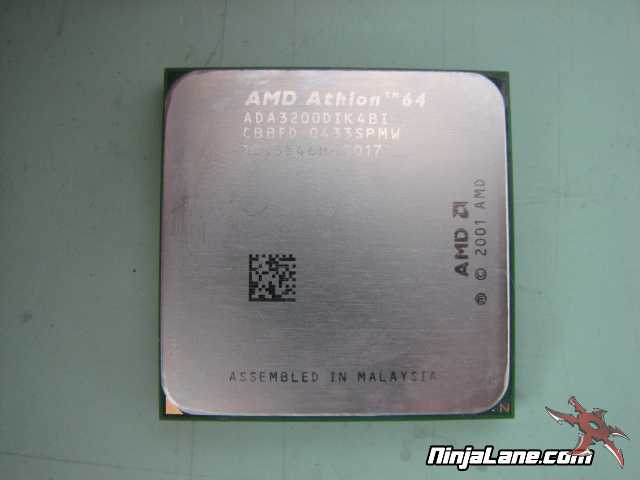
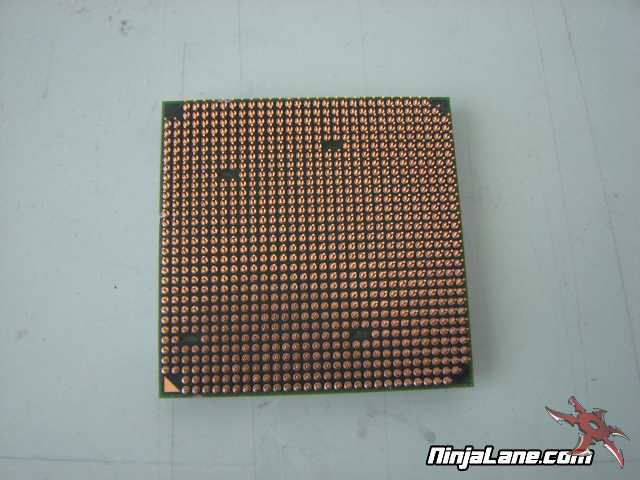
Here is the processor, this happens to be an Athlon64 939 running at 2.0Ghz. Features of this processor include a single processor core, integrated heat spreader and 939 neatly spaced processor pins. Take care not to bend any of these as any misalignment will greatly reduce your chances of a smooth installation.
Note: if any of the pins do become bent you can carefully bend them back using a straight pin and credit card. Basically use the straight pin to create a gap between the bent pin and the one near by. Then use the credit card to finish the bend. Once you get the pin near straight wiggle it into the ZIF socket and lock it in place. The socket will complete the process. Take care not to make a habit of this as with any metal it will fatigue and break.
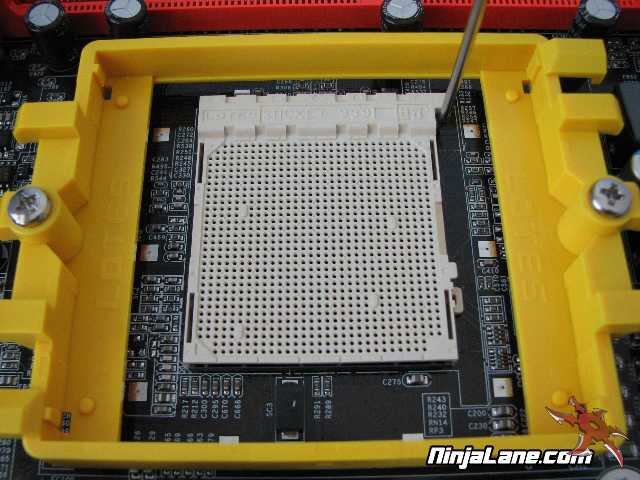
The first step would be to open the ZIF socket by moving the lever into the open position.
Note: if any of the pins do become bent you can carefully bend them back using a straight pin and credit card. Basically use the straight pin to create a gap between the bent pin and the one near by. Then use the credit card to finish the bend. Once you get the pin near straight wiggle it into the ZIF socket and lock it in place. The socket will complete the process. Take care not to make a habit of this as with any metal it will fatigue and break.
The first step would be to open the ZIF socket by moving the lever into the open position.
All chips have a number 1 pin indicator and if you look closely at our photo you can see it marked by a tiny arrow in the lower left. From here note the other corners of the processor. To help with installation the 2 halves of the processor have different pin placements that correspond to places on the processor socket. Align these together and you have the proper orientation.
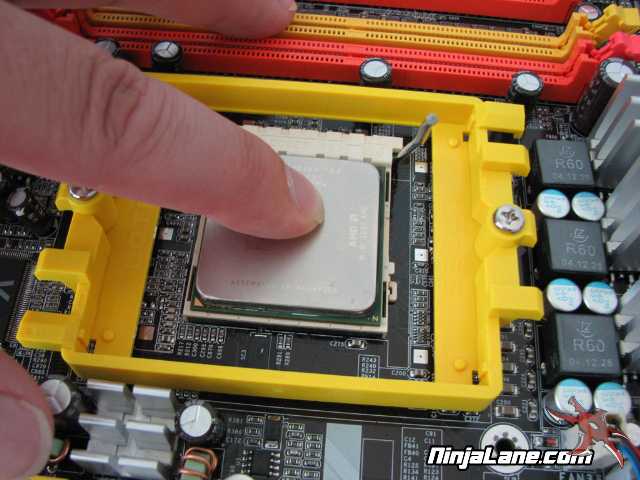
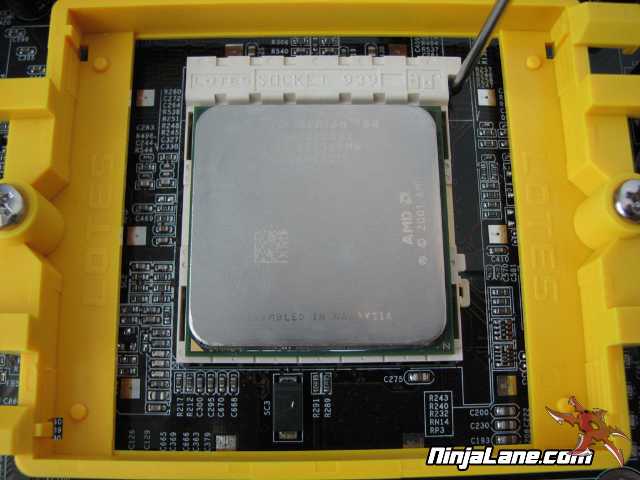
The next step will be to gently place the processor into the socket, it
will easily drop in without any effort, if it does not or there is some
resistance do not force it, simply pick the processor up and re-insert.
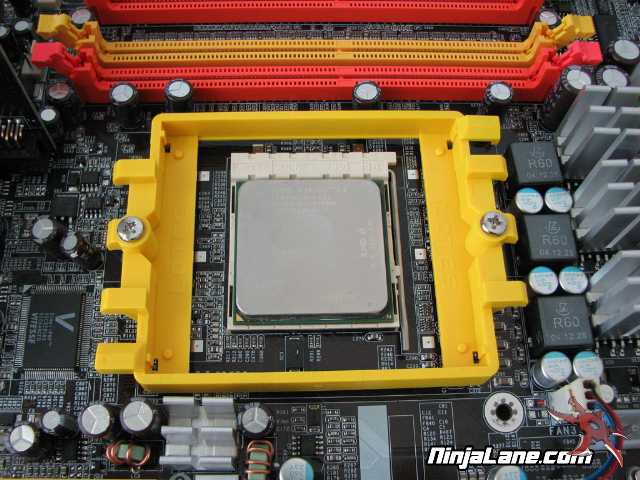
When the processor has been seated place a finger on the processor to hold it down while you swing the locking lever back into the closed
position.