After careful consideration I have decided to transfer all hardware review activities to a new domain. I purchased Hardwareasylum.com in 2012 and have been working hard to build a new and improved Ninjalane on that domain. If you are reading this you have reached one of the archived articles, news, projects and/or reviews that were left behind during the site migration.
Please update your bookmarks and be sure to visit the new and improved Ninjalane at Hardwareasylum.com
Cooler Master V10 Heatsink Review
Author: William West
Published: Saturday, May 09, 2009
Installation
The Cooler Master V10 is ready to be installed with about any modern day processors on the market. With a back plates made to support the fooling processor socket AMD 754/939/AM2/AM3 and Intel socket LGA 775, 1366. These plates are made to help motherboards handle the weight burden that the V10 puts on the motherboard.
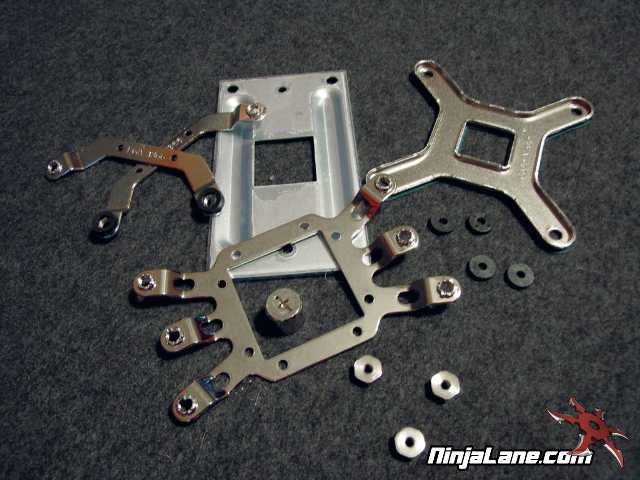
Installation of the Cooler Master V10 is pretty easy for anyone. First thing to do it pick the correct back plate to go with your type of processor socket. Then find the right arms to mount onto the V10 in order to install the V10 onto the motherboard. Then screw on the arms with four little tiny screws onto the bottom of the V10. Add the rubber grommets around the screws to keep the V10 form making shorts on the motherboard.
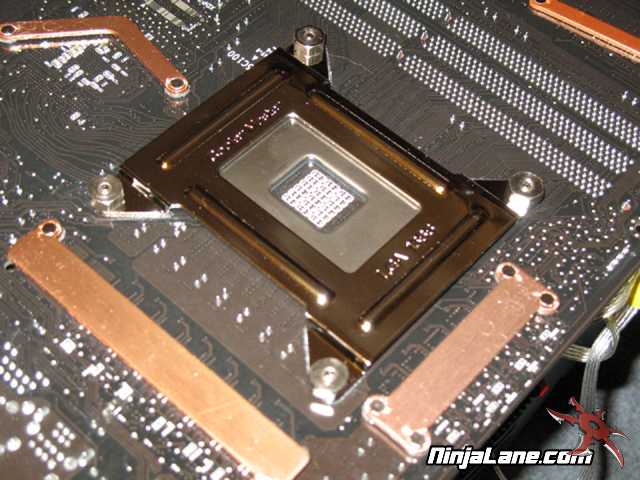
Now lineup the back plate to the holes on the motherboard, and then align the heatsink mounting screws up to the motherboard holes. Sandwich the motherboard between the V10 and the back plate, and screw on the nuts with the special tool Cooler Master provided. During this process also do not forget to use some thermal grease on the processor and the V10 mating up areas.
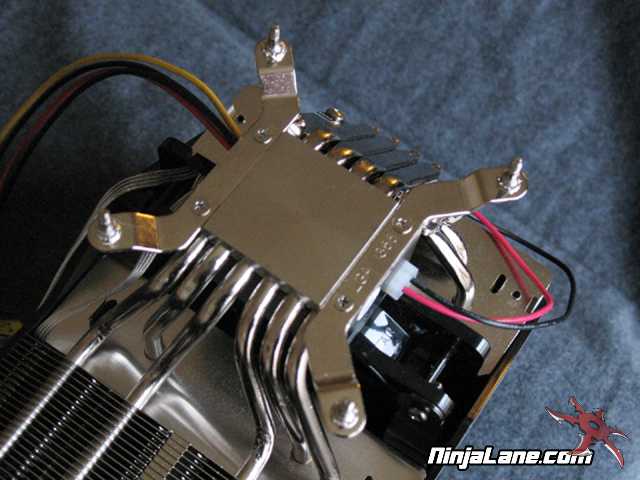
Now this is a very important part of the installation process. Plugging in the PWN Fan power cable that powers not just one but both fans. These fans can be controlled by the motherboard BIOS to the users liking. Then there is one more cable that steams off the TEC controller unit. This power plug should be the only item on the 4-pin plug running from the PSU. It is going to be pulling 70 watts when in use. So you want it working just right and getting feed the proper amount of power. If not could be the risk of smoking your processor.
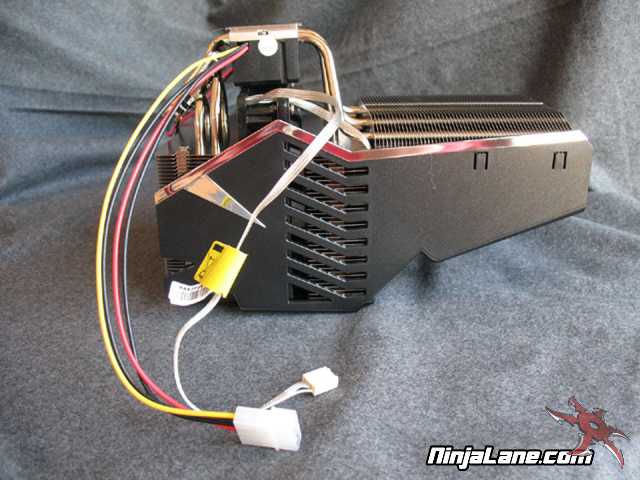
The Cooler Master V10 is a Mammoth of a heatsink overlapping most of the upper part of the motherboard. With its size this orientation is the only way that is going to work properly inside a computer case. On that note everyone has to make sure there case can handle the height and length of the V10 so do your home work before attempting to use this heatsink.
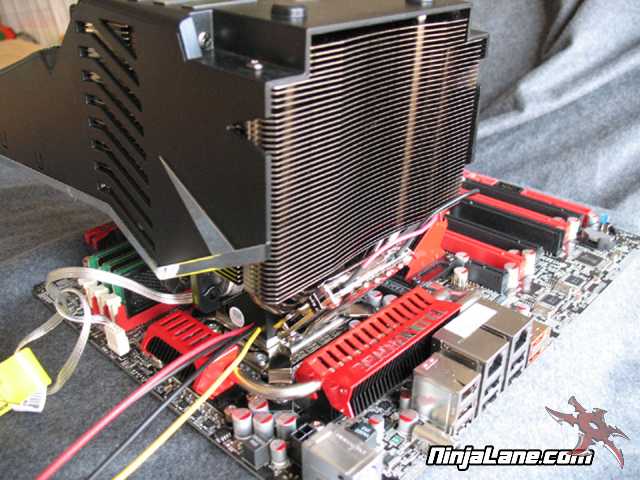

The Cooler Master V10 does more than just cool the processor, and look cool at the same time. The way the V10 is setup it is going to cool parts of the motherboard and the RAM area for sure. This is an added bonus to using the V10. Still there is a small draw back on this though. Using the V10 with RAM modules that use tall heatspreaders will not work together at all.
Let's get to testing the V10 to see what it is made of.
Let's get to testing the V10 to see what it is made of.