After careful consideration I have decided to transfer all hardware review activities to a new domain. I purchased Hardwareasylum.com in 2012 and have been working hard to build a new and improved Ninjalane on that domain. If you are reading this you have reached one of the archived articles, news, projects and/or reviews that were left behind during the site migration.
Please update your bookmarks and be sure to visit the new and improved Ninjalane at Hardwareasylum.com
Installing an Intel 1366 Core i7 LGA Processor
Author: Dennis Garcia
Published: Wednesday, July 15, 2009
Heatsink Install
The last thing is to install the heatsink. The Core i7 is a very hot running processor and to ensure stable overclocks around 4Ghz we like to watercool. The OEM heatsink does a great job keeping the i7 within the normal temperature spec so don't be afraid to use it. However if you plan to overclock at all we suggest you find a better cooling solution.
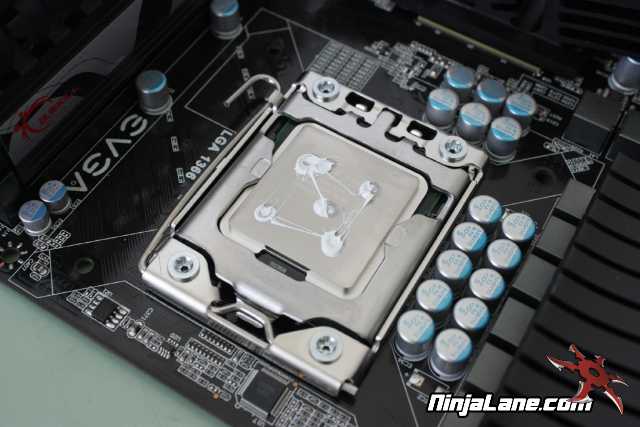
First apply some thermal paste to the processor. We won't really go into the different methods to installing paste but keep in mind that even coverage is important and too much can be bad (along with having too little). A tried and true method we use here in the Ninjalane Labs includes 5 small dabs of paste in the following pattern. When the heatsink is installed the dabs will even out to cover the entire processor.
Note: Some editors will tell you that you must spread the thermal paste as thinly as possible to ensure proper contact. This is good practice however it only works if you have lapped both the CPU and the heatsink. Another method that is thrown around quite often is a single dab or thin line down the middle. The problem with this method is that you have to be very exact in how much paste you apply since it is very easy to leave yourself short.
We find that 5 dabs is a quick, easy and rather foolproof way to install a proper amount of paste without going over.
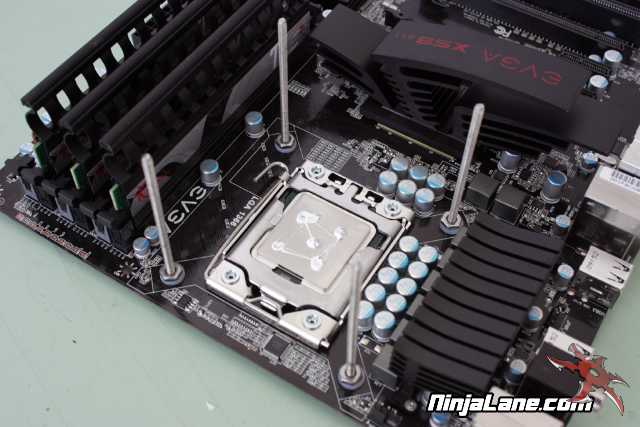
Installing a waterblock does take a little extra time due to the different installation methods the waterblock mfg may offer. For this article we're using the Danger Den TDX and the first step is to install the all-thread mounting posts.
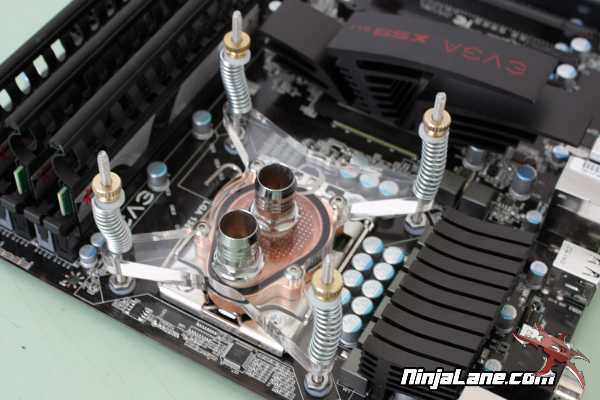
Once the posts have been installed you can place the waterblock, install the pressure springs and washers and slowly tighten down the brass nuts from opposite ends until the springs have compressed but have not collapsed.
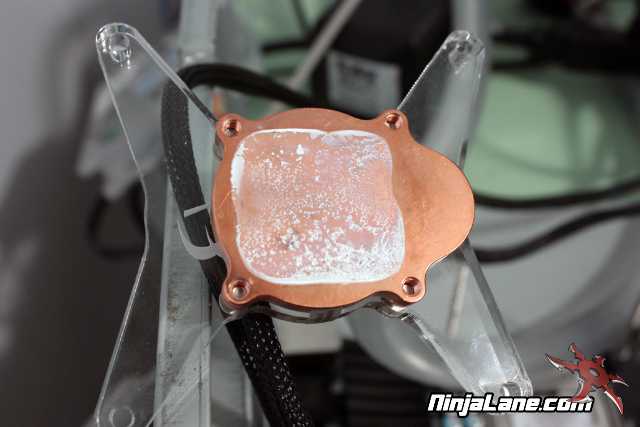
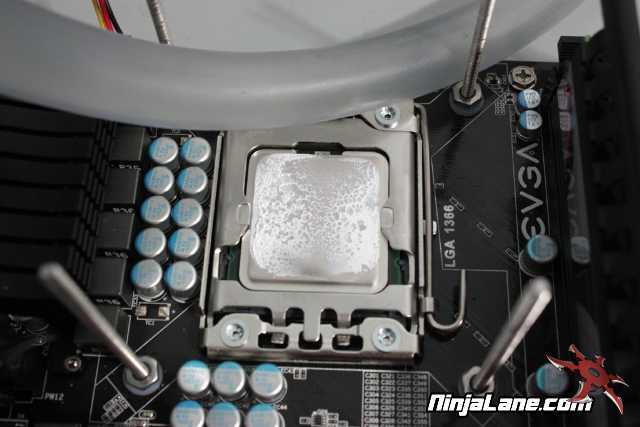
If in case some of you are wondering how well the 5 dots method works here is what our coverage looks after the initial trial fit. As you can see the processor is not flat and the center is higher than the ends if you used a single dab or had spread your paste out evenly you would have a rather large gap in these low areas that will in turn affect heat transfer.
If in case some of you are wondering how well the 5 dots method works here is what our coverage looks after the initial trial fit. As you can see the processor is not flat and the center is higher than the ends if you used a single dab or had spread your paste out evenly you would have a rather large gap in these low areas that will in turn affect heat transfer.
For us the next step is to hook up the hoses, bleed the system, and test for leaks. After that power can be applied and testing can begin.
We hope this quick guide helped you understand the proper method for installing a processor, while this was written as a step by step guide keep in mind that while the methods are similar not all processors install the same way. Consult this site and your included documentation for further information.
Thank you and happy system building.