After careful consideration I have decided to transfer all hardware review activities to a new domain. I purchased Hardwareasylum.com in 2012 and have been working hard to build a new and improved Ninjalane on that domain. If you are reading this you have reached one of the archived articles, news, projects and/or reviews that were left behind during the site migration.
Please update your bookmarks and be sure to visit the new and improved Ninjalane at Hardwareasylum.com
Installing an Intel 775 LGA Processor
Author: Dennis Garcia
Published: Wednesday, July 04, 2007
Processor Install
Open the LGA socket by moving the lever into the option position and lifting the retention clip. They will swing in opposite directions.
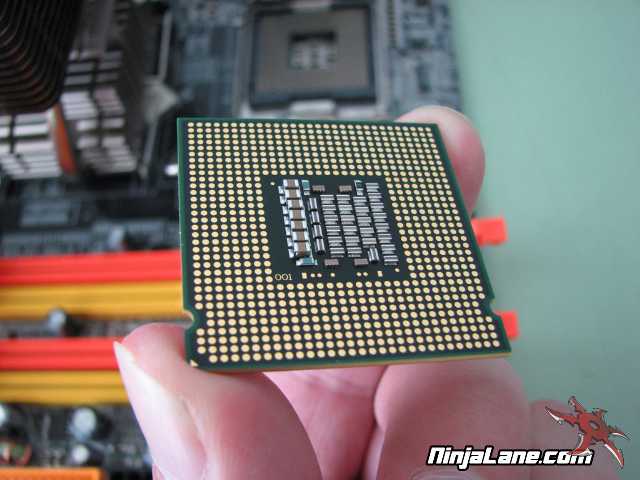
All chips have a number 1 pin indicator and if you look carefully at our photo you’ll see a missing pin in the lower left, this is where number 1 starts and will align with an arrow found on the top of the processor. To help with installation there are 2 alignment blocks in the socket that will line up with 2 cutouts on the processor. Align these together and you have the proper orientation.
All chips have a number 1 pin indicator and if you look carefully at our photo you’ll see a missing pin in the lower left, this is where number 1 starts and will align with an arrow found on the top of the processor. To help with installation there are 2 alignment blocks in the socket that will line up with 2 cutouts on the processor. Align these together and you have the proper orientation.

The thing to keep in mind when installing a processor like this is that it needs to be set in place as flat as possible, if the processor is installed at an angle you risk binding the pins and could cause damage. An easy way to do this is to grab the processor with 2 fingers on opposite sides of the processor, lower it over the socket and drop it in place.
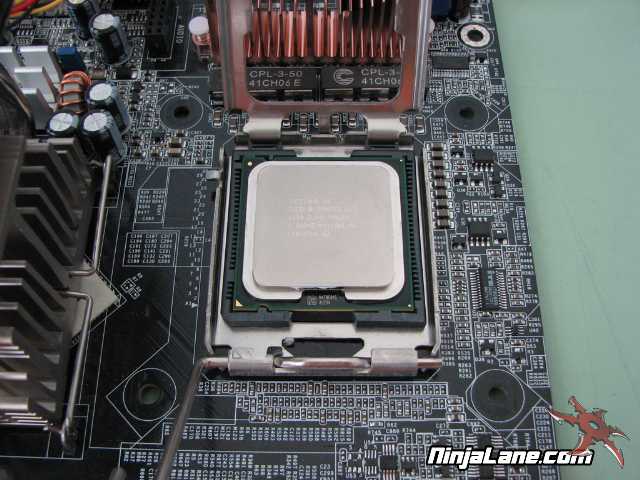
Next swing the retention clip over the processor, and lock it into place with the latch, You will likely hear the pins being scrunched down during this process. The sound is normal.
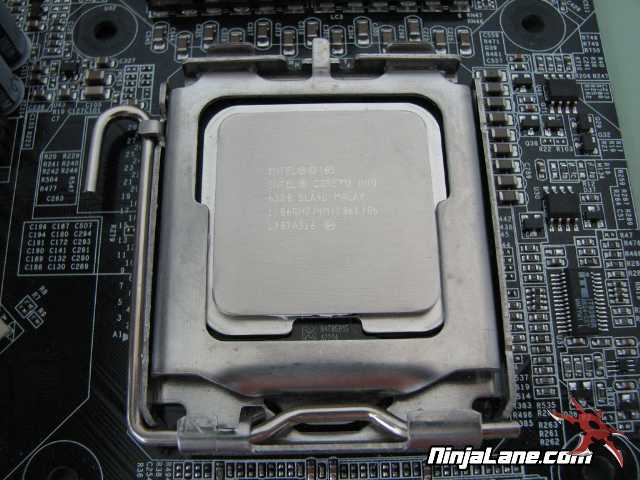
The last thing is to install the heatsink. We’ll be using the OEM unit as most all Intel processors come with them now.
The last thing is to install the heatsink. We’ll be using the OEM unit as most all Intel processors come with them now.
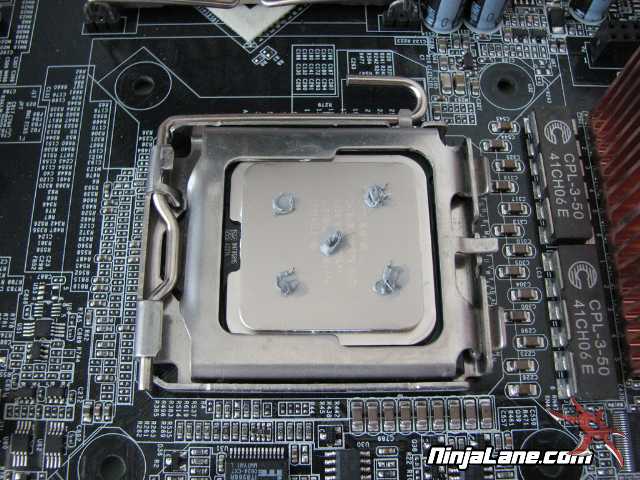
First apply some thermal paste to the processor. We won’t go into the
different methods to installing paste but keep in mind that even
coverage is important and too much can be bad (along with having too
little). A tried and true method we use here in the Ninjalane Labs
includes 5 small dabs of paste in the following pattern. When the
heatsink is installed the dabs will even out to cover the entire
processor. Single dabs in the center also work but we’ve discovered
that you do not get even coverage this way.
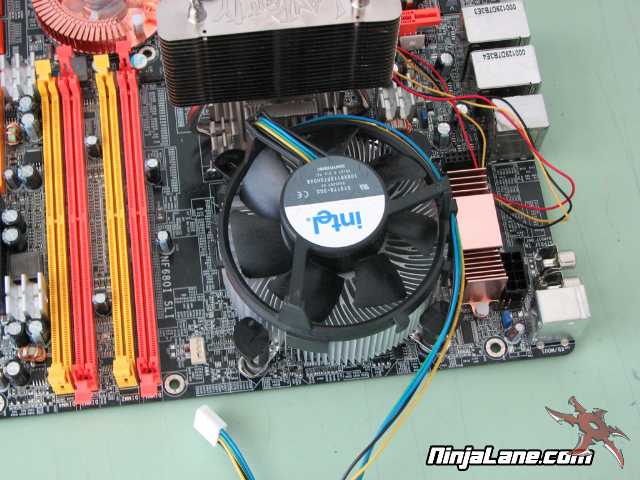
The OEM heatsink installs rather quickly. You'll need to align the attachment pins over the holes on the motherboard and press the black tabs push down to lock the heatsink in place. We’ve found that doing this 2 at a time on opposite corners of the heatsink works best. It also helps if the motherboard is not installed to prevent it from bending.
Connect the fan and you’re done.
We hope this quick guide helped you understand the proper method for installing a processor, while this was written as a step by step guide keep in mind that while the methods are similar not all processors install the same way. Consult this site and your included documentation for further information.
Thank you and happy system building.