After careful consideration I have decided to transfer all hardware review activities to a new domain. I purchased Hardwareasylum.com in 2012 and have been working hard to build a new and improved Ninjalane on that domain. If you are reading this you have reached one of the archived articles, news, projects and/or reviews that were left behind during the site migration.
Please update your bookmarks and be sure to visit the new and improved Ninjalane at Hardwareasylum.com
CoolJag CJC665C Review
Author: Dennis Garcia
Published: Thursday, October 09, 2003
Introduction
When it comes Pentium 4 heatsinks the way they are installed is pretty standard. Most use the stock heatsink cage and apply pressure from the top while others use spring clips to hold the heatsink at its base. The spring clip design reduces the overall width of the heatsink but does allow for taller designs to be installed.
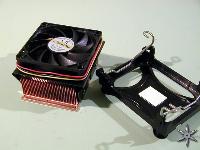
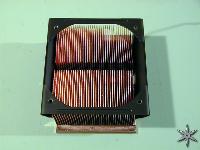
The CoolJag CJC665C is a very unique heatsink that uses a variation of the spring clip design but doesn't use the stock heatsink mounting cage. Instead CoolJag has included one of their own design.
The CoolJag CJC665C is a very unique heatsink that uses a variation of the spring clip design but doesn't use the stock heatsink mounting cage. Instead CoolJag has included one of their own design.
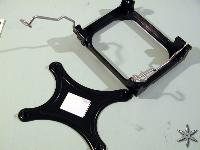
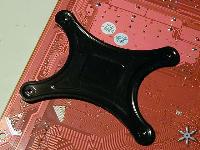
The heatsink cage consists of two parts, the first is a plastic mounting bracket with two spring style clips, the second is a metal back plate that holds the unit in place. The back plate is a nice addition since it will help reinforce the PCB and prevent the board from bending under stress.
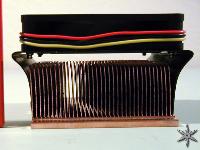
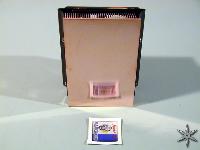
One nice thing about the CoolJag CJC665C is the use of copper skiving to create the heatsink. The skiving process entails shaving the fins from the base material and making them uniform in thickness and spacing. This aids in cooling due to the direct metal connection and is even more economical to produce. The underside features a flat and shiny machine finish that appeared to have no visual imperfections.
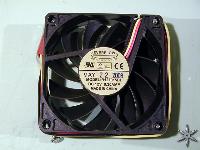
The fan is a 70x70x15mm unit from Everflow that spins around 4200rpm and is fairly quiet considering the rotational speed. The fan mount is very simple and spaced a considerable distance from the heatsink. The added space helps to provide adequate air velocity with a minimal amount of induced noise.
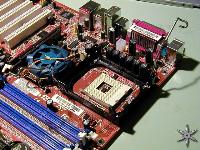
Installation is rather simple with the hardest part being the removal of the stock heatsink cage. After the cage has been removed the new mounting system and metal base are installed and fastened together with screws. The nice thing about this style of installation is that if you decide to change heatsinks later you can leave the back plate installed and just change the mounting cage on top.

