After careful consideration I have decided to transfer all hardware review activities to a new domain. I purchased Hardwareasylum.com in 2012 and have been working hard to build a new and improved Ninjalane on that domain. If you are reading this you have reached one of the archived articles, news, projects and/or reviews that were left behind during the site migration.
Please update your bookmarks and be sure to visit the new and improved Ninjalane at Hardwareasylum.com
Thermalright Venomous X Heatsink Review
Author: Dennis Garcia
Published: Thursday, April 22, 2010
Installation
Installing the Venomous X is pretty straight forward. The accessory box comes with everything you need including the reinforced back plate, a plastic spacer, mounting screws, fan retention clips, and various tools.

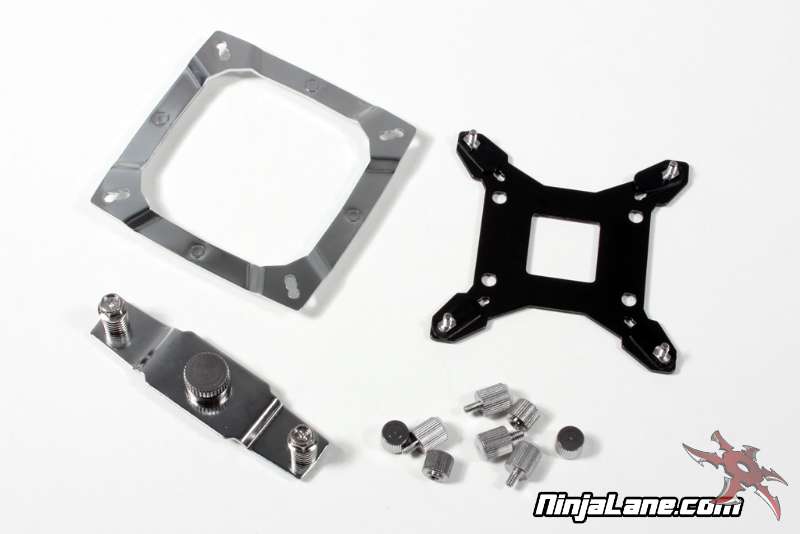
You start by mounting the back plate which is then held in place by the finger screws with the threads on top. We mounted these finger tight, which should be more than enough.
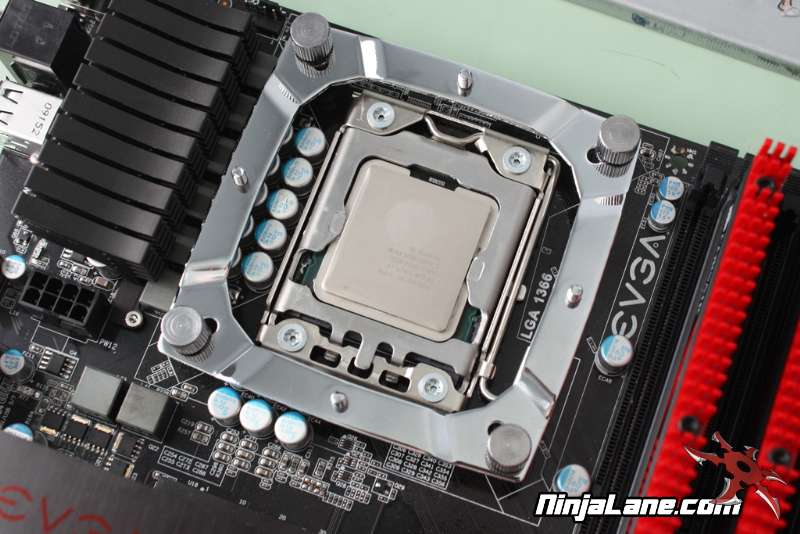
Next you will install the actual mounting plate over the screw tops and lock it into place with the second set of finger screws. Again finger tight is more than enough.
Next you will install the actual mounting plate over the screw tops and lock it into place with the second set of finger screws. Again finger tight is more than enough.
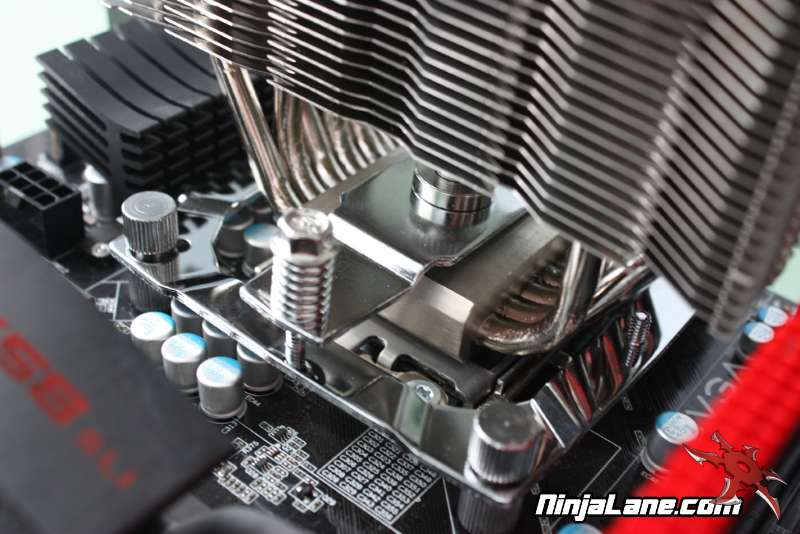
The last part of the installation is to apply the thermal paste and secure the retention clip. We installed these until they stopped and then adjusted the mounting pressure using the large center screw. According to the Thermalright website, this center screw will adjust the mounting pressure between 40 and 70 lbs.
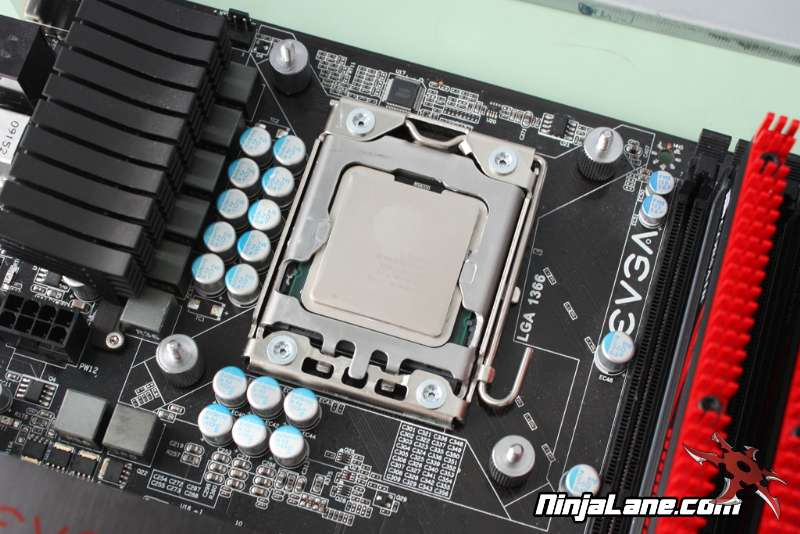
For this review we are using the LGA 1366 system but the Venomous X can be installed on all current Intel platforms including 775, 1156, and 1366 by adjusting the screw positions on the reinforced back plate.
For this review we are using the LGA 1366 system but the Venomous X can be installed on all current Intel platforms including 775, 1156, and 1366 by adjusting the screw positions on the reinforced back plate.

Once the heatsink has been installed the only thing left is to affix your favorite 120mm fan and away you go. For our tests we're using a Thermaltake high flow fan, but you can use just about anything.
The Venomous X is a rather large heatsink so be sure to check your clearances. In our case we had no problems, however populating the second bank of memory would prove to be difficult depending on the height of the memory modules.
The Venomous X is a rather large heatsink so be sure to check your clearances. In our case we had no problems, however populating the second bank of memory would prove to be difficult depending on the height of the memory modules.