After careful consideration I have decided to transfer all hardware review activities to a new domain. I purchased Hardwareasylum.com in 2012 and have been working hard to build a new and improved Ninjalane on that domain. If you are reading this you have reached one of the archived articles, news, projects and/or reviews that were left behind during the site migration.
Please update your bookmarks and be sure to visit the new and improved Ninjalane at Hardwareasylum.com
Installing a Motherboard - First Time or Upgrade
Author: Dennis Garcia
Published: Monday, November 15, 2010
Setting Up Your Case
To begin remove the side panel from your chassis and remove all of the loose parts that may be in there. Among those parts will be a box or bag of case hardware. Set these aside as you will need them later on.
Next you will want to inspect the motherboard tray and determine if you need to install any motherboard standoffs. Some cases come with bumps while others are drilled and tapped like the one we have. Cases with raised bumps will usually not require additional standoffs except where they may not match up with the motherboard. Our case is designed for workstation and server usage so you will find a number of holes drilled so to handle all of the different form factors.
Motherboard standoffs are typically made from brass and serve as a connection between the motherboard and the case in specific locations. I have circled the standoffs that have already been installed and included a close up of what a standoff looks like after it has been installed. The arrows indicate locations where we need to install additional standoffs to support our motherboard.
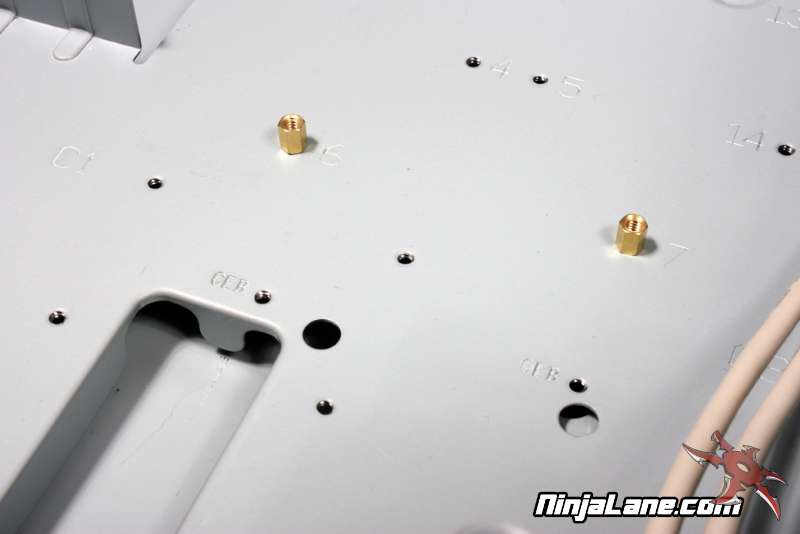
It is always best to trial fit everything before you get to far into the installation process mostly to determine if something is out of place or needs to be installed. The photo here shows a good way to figure out what hole to use when adding more standoffs.
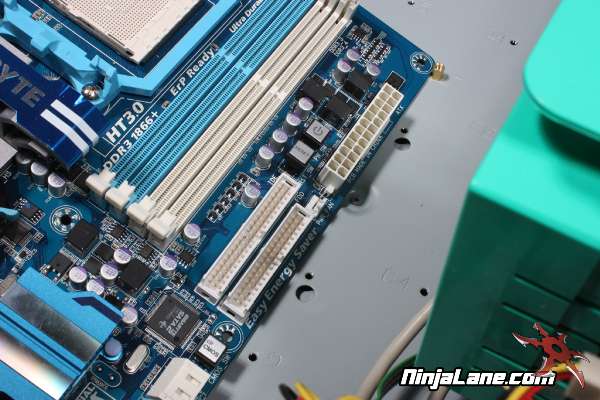
Pay careful attention to standoffs that don't line up with any mounting holes on the motherboard, these can make contact with the board and cause nasty shorts that are difficult to track down, or even worse cause your system to go up in smoke.
Pay careful attention to standoffs that don't line up with any mounting holes on the motherboard, these can make contact with the board and cause nasty shorts that are difficult to track down, or even worse cause your system to go up in smoke.
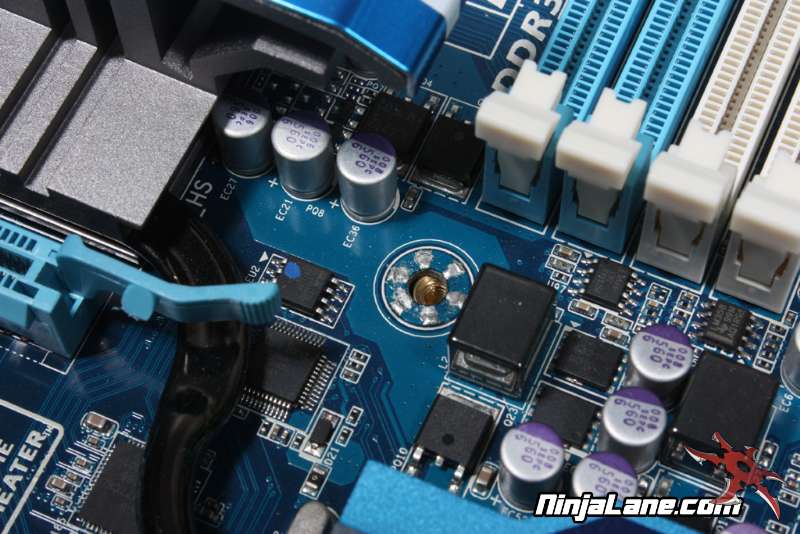
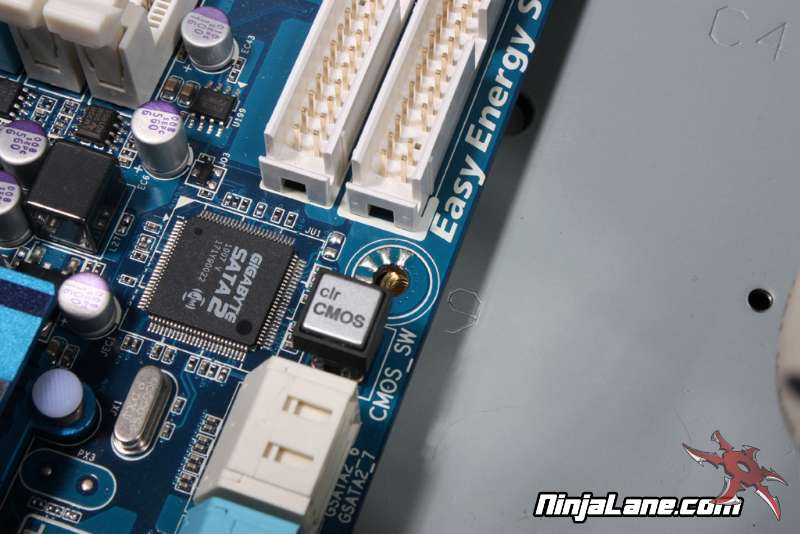
When the standoffs have been properly installed you will be able to see the threads thru the mounting location. Here are a couple examples of what that looks like.
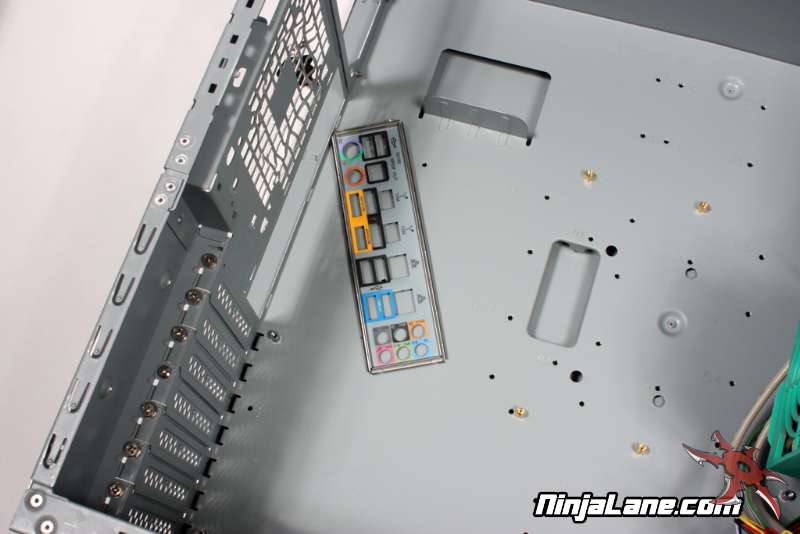
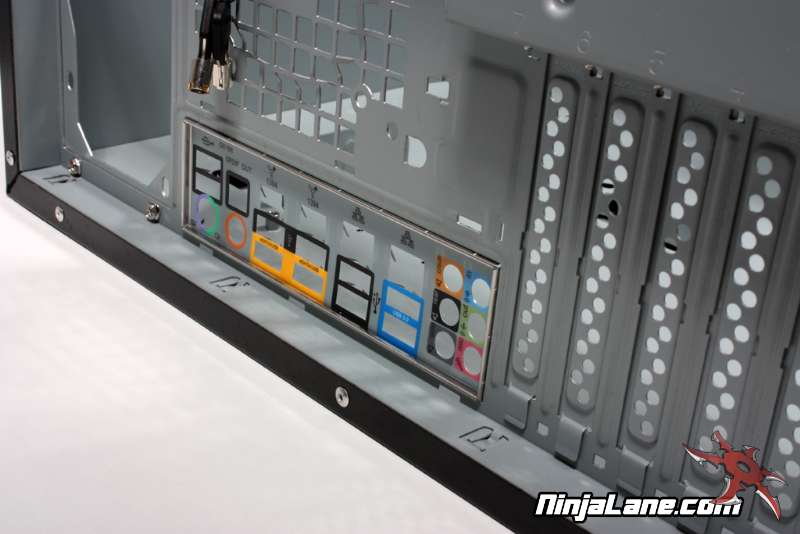
The next step is to install the I/O backplate. The size and format of the backplate is an ATX standard so it should simply snap in. Just make sure to have the keyboard and mouse ports positioned at the top. When properly installed the backplate will sit flush in the case and look something like this.