After careful consideration I have decided to transfer all hardware review activities to a new domain. I purchased Hardwareasylum.com in 2012 and have been working hard to build a new and improved Ninjalane on that domain. If you are reading this you have reached one of the archived articles, news, projects and/or reviews that were left behind during the site migration.
Please update your bookmarks and be sure to visit the new and improved Ninjalane at Hardwareasylum.com
Installing a Motherboard - First Time or Upgrade
Author: Dennis Garcia
Published: Monday, November 15, 2010
Installing the Motherboard
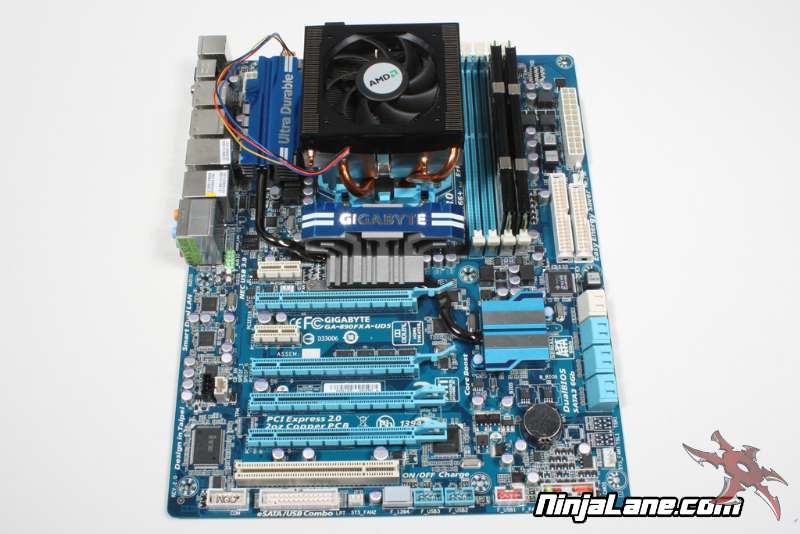
I always like to assemble the motherboard components outside of the chassis; this gives me more room to work and prevents the motherboard from flexing when installing memory or large heatsinks. Some large aftermarket heatsinks may require you to assemble them outside of the case, if so just make sure you follow the mfg instructions.
For a detailed look at installing a processor choose one of the links below.
Installing an Intel 1366 Core i7 LGA Processor
Installing an Intel 775 LGA Processor
Installing an AMD Athlon64 Processor
For a detailed look at installing a processor choose one of the links below.
Installing an Intel 1366 Core i7 LGA Processor
Installing an Intel 775 LGA Processor
Installing an AMD Athlon64 Processor
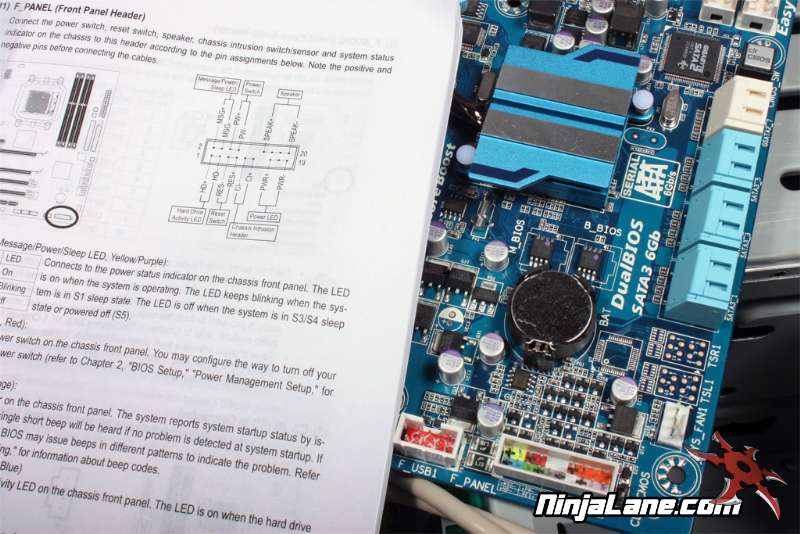
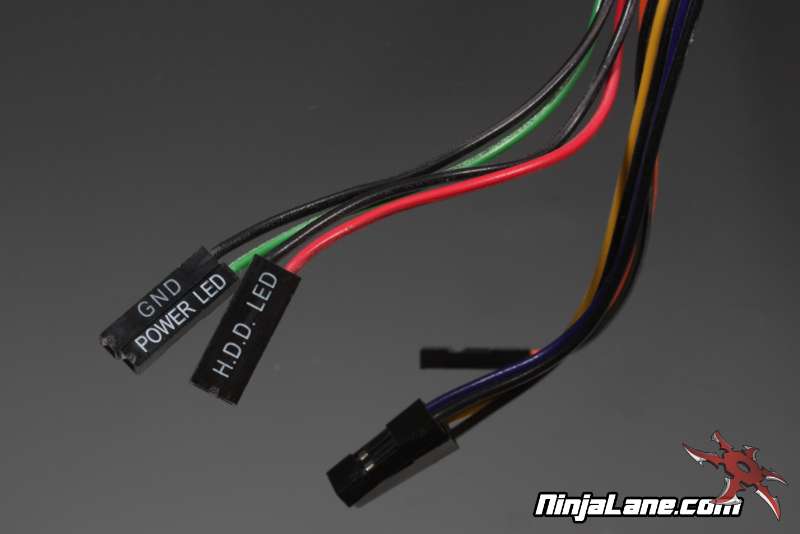
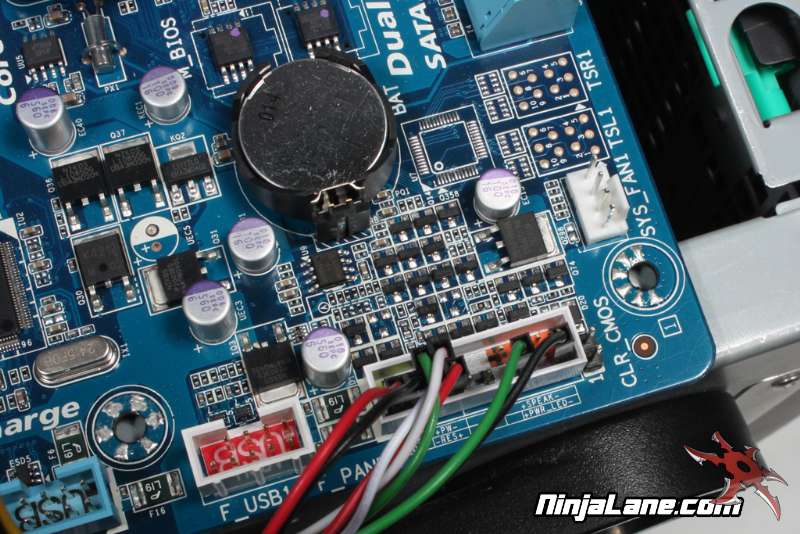
Before securing the motherboard in place it is often helpful to connect the front panel controls. For this you will need to consult the motherboard manual and locate the front panel wiring harness. The ends will be marked as to what they do; all that is left is to match them up.
Note: black is always ground (or negative) and the colored wire is signal (or positive) Your motherboard manual will indicate which post is positive. You may need to flip the connector so the colored wire lines up with the positive post.
Note: black is always ground (or negative) and the colored wire is signal (or positive) Your motherboard manual will indicate which post is positive. You may need to flip the connector so the colored wire lines up with the positive post.
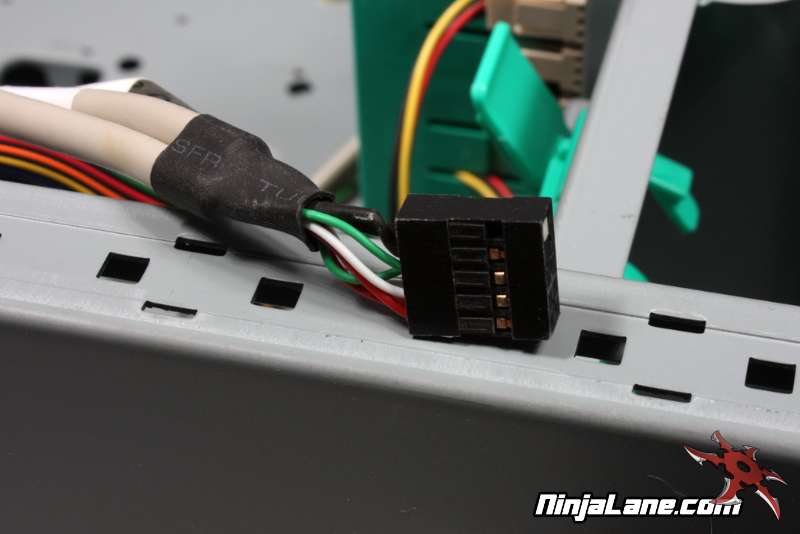
The big wire blocks, like the one shown here, are for USB and Firewire. Simply connect as needed to the headers on your motherboard.
Here we have all of the wires hooked up, the last step is to install the motherboard and screw it down.
Here we have all of the wires hooked up, the last step is to install the motherboard and screw it down.
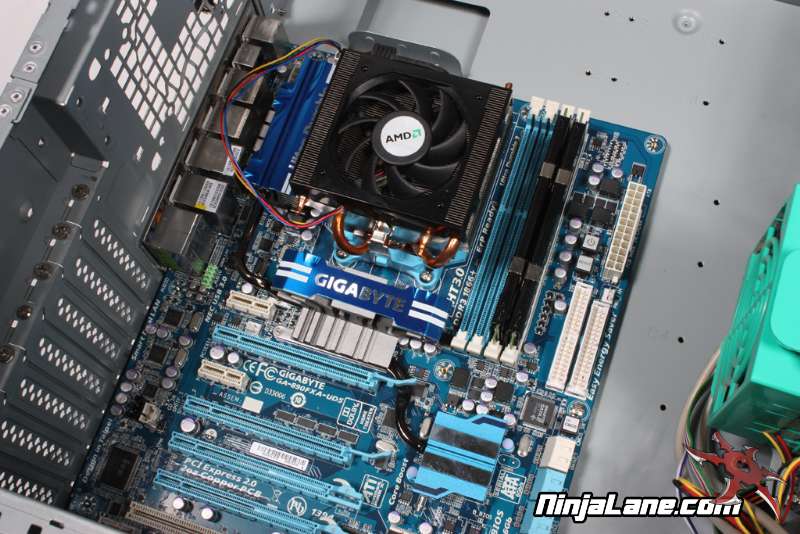
Keep in mind the I/O backplate will have a series of springs that prevent the motherboard from simply dropping into place. The springs are there to keep the backplate installed and to also help ground the motherboard. Needless to say, don't remove them.
The trick here is to line up the motherboard so that everything on the I/O panel is in the proper location and push the board over with one hand while you install a single screw to hold it in place. The middle hole opposite of the I/O panel works well for this and allows you to reposition the board so the other holes line up. At this point check the I/O panel for any obstructions and install the rest of the mounting screws.
And that is it! You have successfully installed a motherboard.