After careful consideration I have decided to transfer all hardware review activities to a new domain. I purchased Hardwareasylum.com in 2012 and have been working hard to build a new and improved Ninjalane on that domain. If you are reading this you have reached one of the archived articles, news, projects and/or reviews that were left behind during the site migration.
Please update your bookmarks and be sure to visit the new and improved Ninjalane at Hardwareasylum.com
Soltek SL-85DRS2 Motherboard Review
Author: Dennis Garcia
Published: Wednesday, February 06, 2002
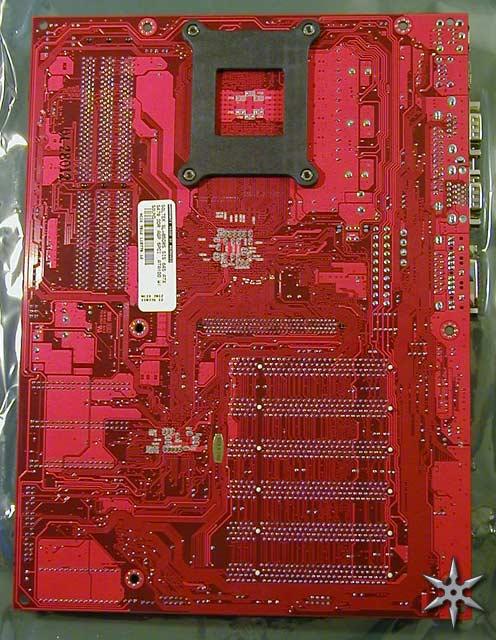
Board Layout
The motherboard layout is quite similar to the reference boards that I've seen. IDE device connections
are spaced apart similar to the reference design in the lower right section of the motherboard. The Northbridge features no active cooling and
never really was hot to the touch during testing so it is most likely not needed. Other than the Soyo Dragon I have yet to see
a SiS645 motherboard equipped with AGP Pro, then again considering how many AGP Pro video
cards are available I don't see it as being a deciding factor in a purchase. Something that I am really pleased with is the
included Heatsink mounting bracket, Not only is it bolted directly to the motherboard but has a backing plate to help strengthen the PCB
and evenly distribute pressure from the heatsink to the processor. Many heatsinks like the AVC "Sunflower" come with a
mounting bracket similar to this but do not have the backing plate.
Other items in the package include a driver CD, system utility disk with full version programs like Drive Image Pro and Partition Magic, users manual, thermal probe, and drive cables (ATA100 & Floppy).
Other items in the package include a driver CD, system utility disk with full version programs like Drive Image Pro and Partition Magic, users manual, thermal probe, and drive cables (ATA100 & Floppy).

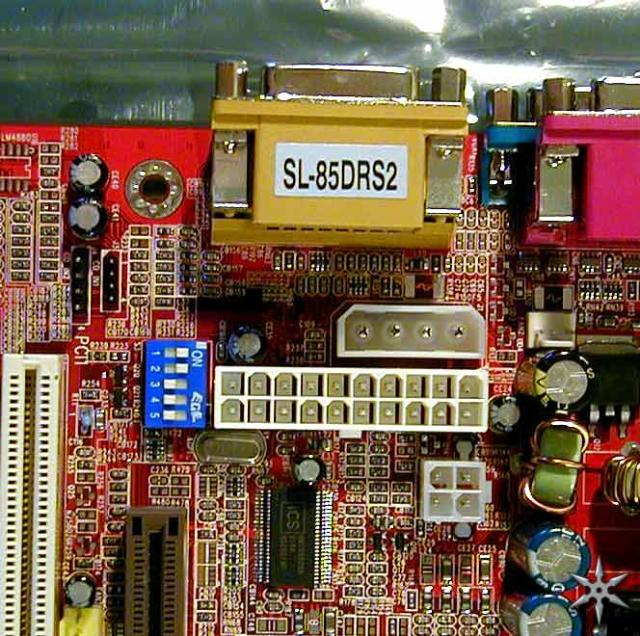
To the left of the ATX connector is a set of 5 dipswitches. This is the only way to set the FSB to
anything other than 100 and 133. The available FSB settings are pretty slim and include (100, 105, 108, 112, 133)
but only in DDR266 mode. If you wish to use DDR333 your choices are (100, 133). It should also be noted that you can bypass
this hardware level setting by choosing from a list within the bios. Bios options include 100/(100,133,166) and
133/(100,133,166). The users guide claims that 66/66 and 100/200 are also available though I have yet to find them.