After careful consideration I have decided to transfer all hardware review activities to a new domain. I purchased Hardwareasylum.com in 2012 and have been working hard to build a new and improved Ninjalane on that domain. If you are reading this you have reached one of the archived articles, news, projects and/or reviews that were left behind during the site migration.
Please update your bookmarks and be sure to visit the new and improved Ninjalane at Hardwareasylum.com
asetek WaterChill Review
Author: Dennis Garcia
Published: Saturday, November 08, 2003
Waterblock Installation
Installing the WaterChill CPU block is very easy and similar to other waterblock installations. The photos are geared towards the Pentium 4 but Athlon installs are the same.
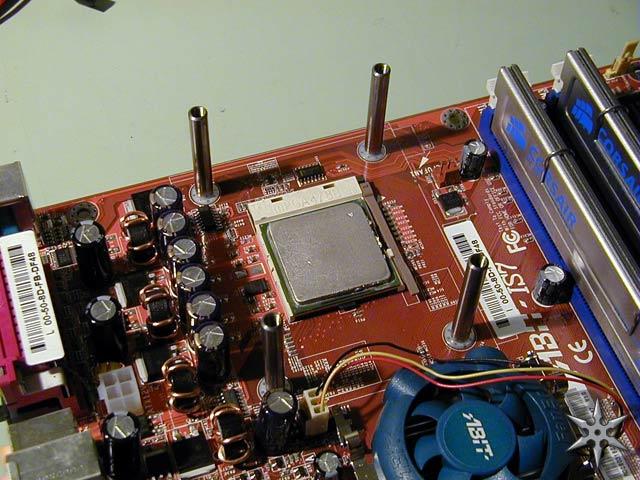
First the heatsink mounting cage will need to be removed to expose the 4 mounting holes. Mounting posts are then installed with a single Teflon washer residing between the screw head and the motherboard.
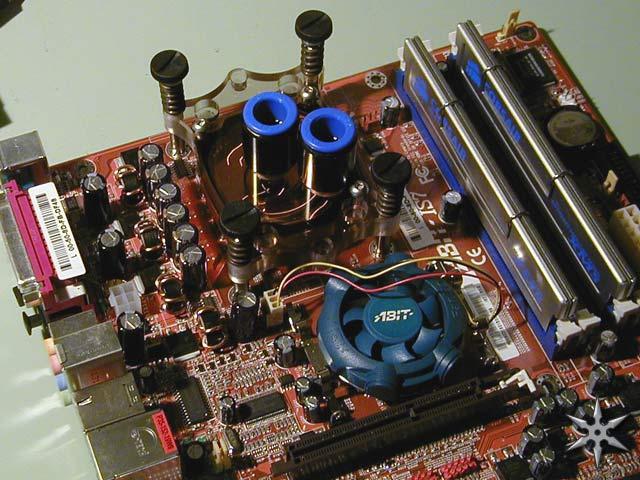
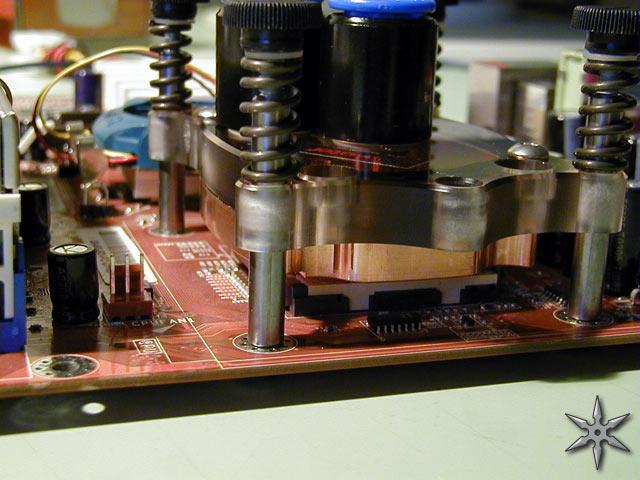
Processor and thermal paste are installed next followed by the CPU block. Due to the thickness of the plastic the fit is very solid with no rocking or movement in any direction except up and down. Once the block has been installed each post will get a spring, Teflon washer and thumbscrew. The thumbscrews are tightened down a half turn each, in a figure 8, until they stop.
The next photo shows the finished product. After the CPU block has been mounted you can install the clear tubing and begin filling the system. The push type hose connections are very strong and seem to get stronger with the more force you exert on them. This is a very good indication that the watercooling system will remain leak free but it is still a good idea to do a fair amount of leak testing before the system is completely installed.
As we know water and electricity do not mix, so be careful and use your head. (This message brought to you by the staff at Ninjalane who say "if you break it, it's your fault, don't come crying to us")
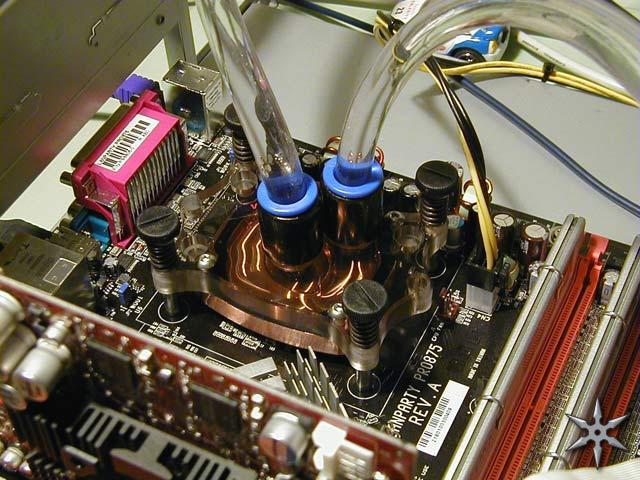
Some people with a keen eye will notice that I have featured two different motherboards in these photos. The reason for this is pretty simple, I fried the IS7 while running my 2.4C @ 3.2Ghz. I suspect that the Northbridge overheated but I cannot be sure. After trying everything to revive the board I swapped it out for a DFI Lanparty Pro875 and restarted the benchmarking process. The Canterwood board seemed to respond better to the watercooler but needed a little extra airflow over the Northbridge to remain stable.
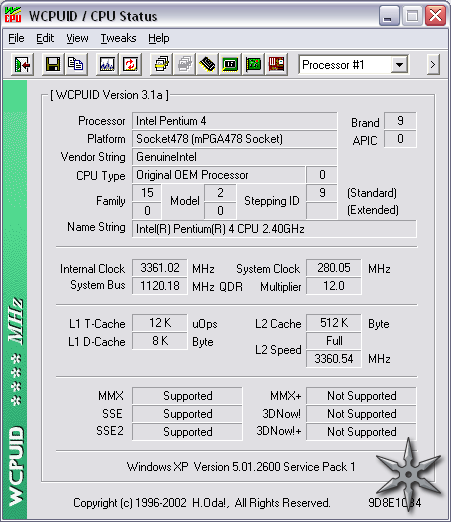
Wcpuid