After careful consideration I have decided to transfer all hardware review activities to a new domain. I purchased Hardwareasylum.com in 2012 and have been working hard to build a new and improved Ninjalane on that domain. If you are reading this you have reached one of the archived articles, news, projects and/or reviews that were left behind during the site migration.
Please update your bookmarks and be sure to visit the new and improved Ninjalane at Hardwareasylum.com
Soltek SL-75FRN-L Motherboard Review
Author: Dennis Garcia
Published: Monday, February 03, 2003
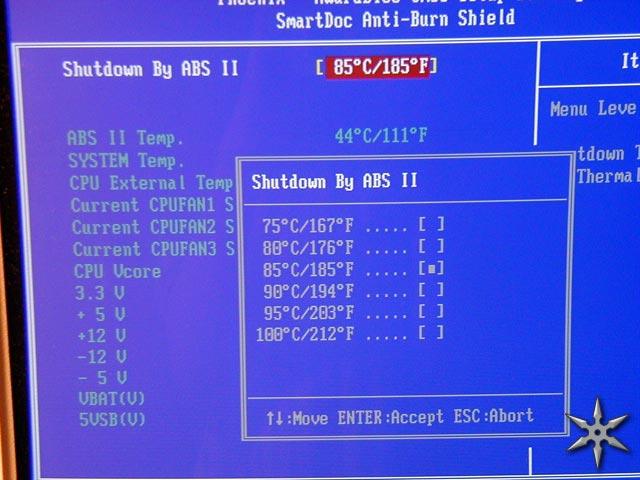
BIOS Features
BIOS Features
Currently this is a sore issue with some users of the SL-75FRN but we find the BIOS to be quite powerful.
The BIOS shown has been updated to the latest version from the Soltek website (as of this writing the current version is 1.2). The 1.1 BIOS didn't contain any multiplier controls and neither version has the Soltek "Red Storm Overclocking Technology". Seeing that this is one of the major items that separates Soltek from the rest of the crowd we are quite surprised to see it missing.
The BIOS shown has been updated to the latest version from the Soltek website (as of this writing the current version is 1.2). The 1.1 BIOS didn't contain any multiplier controls and neither version has the Soltek "Red Storm Overclocking Technology". Seeing that this is one of the major items that separates Soltek from the rest of the crowd we are quite surprised to see it missing.
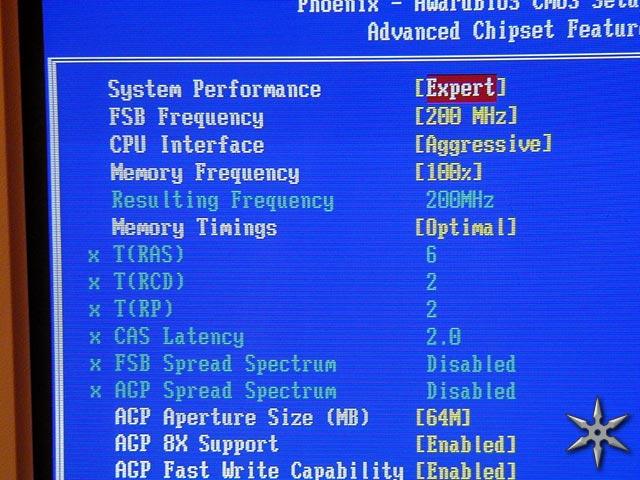
This screen is where all of the fun takes place and gives you full and complete control over your memory and FSB speed. Soltek has also included a series of pre-defined menus that aid in system tuning. Aside from Optimal, Aggressive and Expert they have very limited usage.
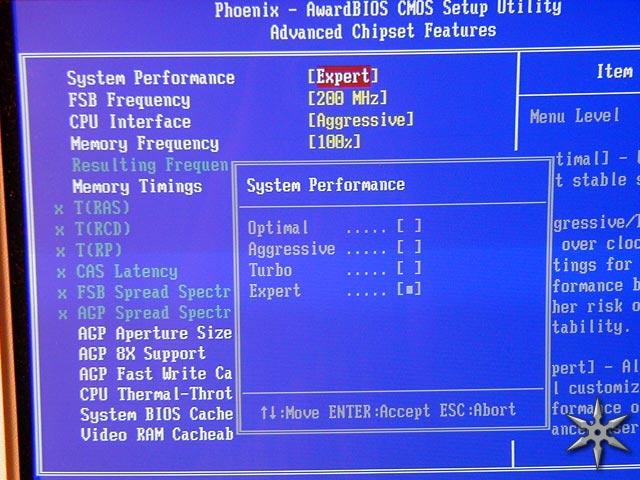
System performance is menu driven and effects FSB and CPU interface settings, when you adjust the FSB to a non standard setting you will want to put the CPU interface in aggressive mode to take advantage of the new speed setting.
Resulting frequency is not selectable but is driven off of the FSB speed and memory frequency.
The Memory frequency list is incremented by 10% with settings that range from 10 to 200, The list also includes optional SPD and Auto settings giving you a lot of flexibility over how the memory controller uses your installed memory.
Memory timings is menu controlled and depends on the settings above and controls the timings list below.
Now on to testing.