After careful consideration I have decided to transfer all hardware review activities to a new domain. I purchased Hardwareasylum.com in 2012 and have been working hard to build a new and improved Ninjalane on that domain. If you are reading this you have reached one of the archived articles, news, projects and/or reviews that were left behind during the site migration.
Please update your bookmarks and be sure to visit the new and improved Ninjalane at Hardwareasylum.com
NVidia GeForce GTS 450 SLI Performance Review
Author: Will West
Published: Wednesday, October 27, 2010
SLI Setup
To setup a SLI system you need to have a few key components and follow some simple steps
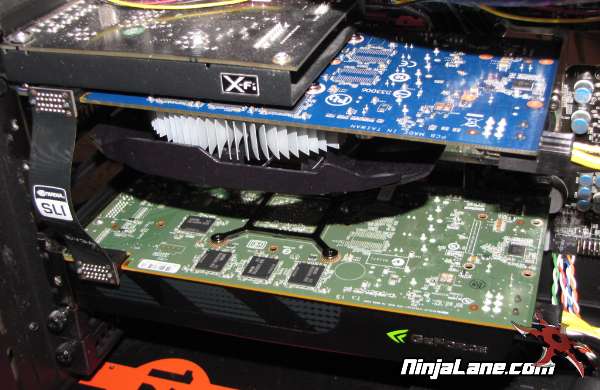
The first piece is, of course, more than one of the same graphic card. How many will depend on the bridge connectors across the top of the card. If you have a single bridge connector you can run up to 2 cards in SLI.
Next you will need a motherboard with multiple 16x PCI-Express slots with proper spacing for your graphic cards. If you have dual slot GPU coolers then you will need at least one open slot below the 16x connector. Make sure to find out if your motherboard is certified to run SLI / CrossFire. Some may come with 16x PCI Express slots but lack the lanes required to link the cards together. Most modern boards will easily pass this test, however older chipsets may not.
After the cards have been installed, simply attach the bridge connector and hook up the power leads. The amount of power is also extremely important, not only for performance of your system but longevity of your cards.
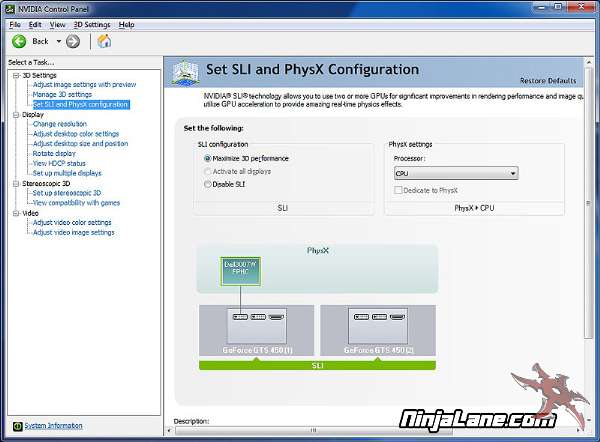
The final step is to enable SLI using the NVidia ForceWare Control Panel, from here you'll be able to enable or disable SLI, configure PhysX dedication and even tweak 3D settings.
To get the most out of a single display with multiple graphic cards select "Maximize 3D performance" and press apply. After a quick reboot you'll be up and running.
To get the most out of a single display with multiple graphic cards select "Maximize 3D performance" and press apply. After a quick reboot you'll be up and running.